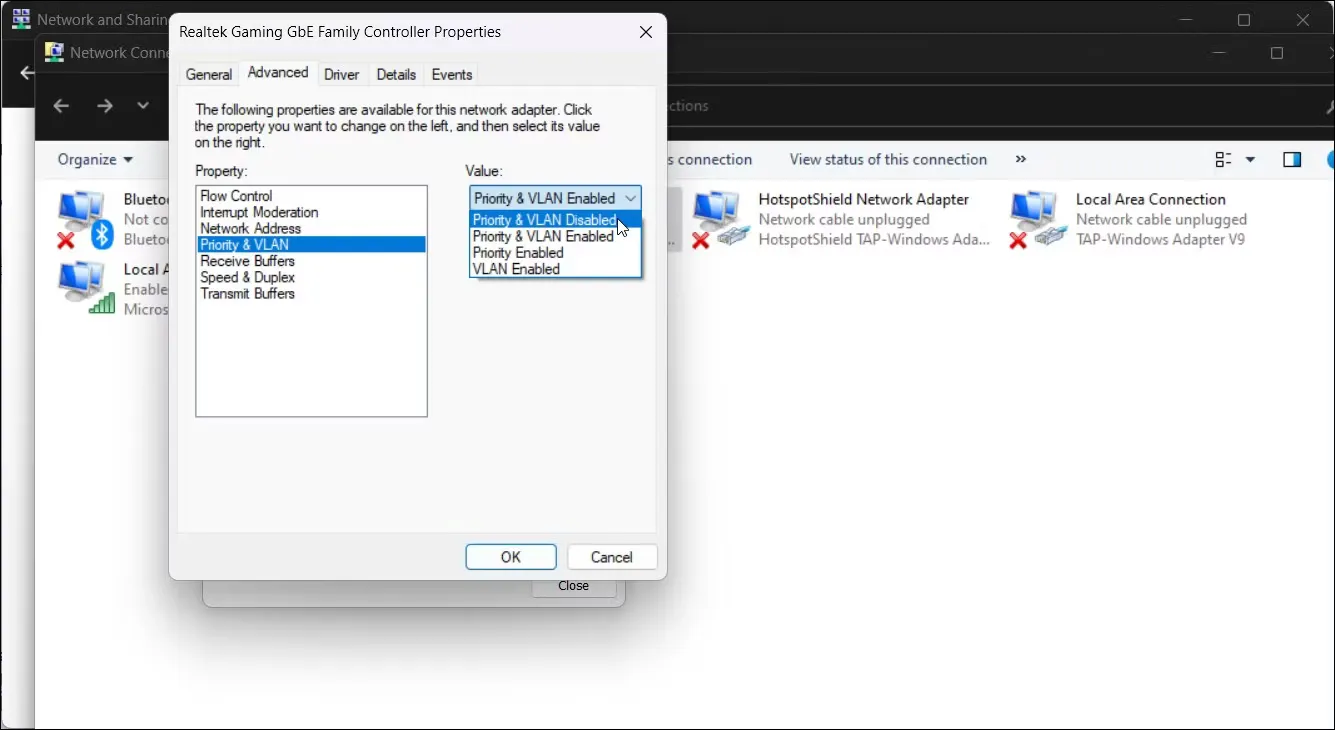
Since Windows automatically prioritizes the network adapter to use only one adapter at a time, you’ll need to disable the packet priority option in the network adapter’s network configuration. Doing so will allow Windows to use multiple connections simultaneously. This is how to configure Wi-Fi and Ethernet connections simultaneously
- Press
Win + Rto open Run. - Type
controland click OK to open Control Panel. - Next, go to Network and Internet and click on Network and Sharing Center.
- In the left pane, click on Change adapter settings.
- Right-click on your Ethernet network adapter and select Properties.
- In the Networking tab, click the Configure button.
- Open the Advanced tab.
- Select Priority and VLAN under the Property section.
- Click the drop-down under Value.
- Select Priority and VLAN Disabled.
- Click OK to save the changes.
- Next, you need to repeat the steps for your Wi-Fi adapter. So, open Properties for your Wi-Fi adapter and set its Priority and VLAN value to Priority & VLAN Disabled.
- Click OK to save the changes.

With the network adapter priority option disabled, Windows will now use Wi-Fi and Ethernet connections simultaneously.
