

Eftersom Windows automatiskt prioriterar nätverkskortet så att det bara använder ett kort i taget, Du måste inaktivera alternativet Paketprioritet i nätverkskortets nätverkskonfiguration. Om du gör det kan Windows använda flera anslutningar samtidigt. Så här konfigurerar du Wi-Fi och Ethernet-anslutningar samtidigt
- Trycka
Win + Rför att öppna Kör. - Typ
controloch klicka OK för att öppna Kontrollpanelen. - Nästa, gå till Nätverk och Internet och klicka på Nätverks- och delningscenter.
- I den vänstra rutan, Klicka på Ändra adapterinställningar.
- Högerklicka på din Ethernet-nätverkskort och väljer Egenskaper.
- I Nätverk flik, Klicka på knappen Konfigurera .
- Öppna den Avancerad flik.
- Välj Prioritet och VLAN under Egenskap sektionen.
- Klicka på rullgardinsmenyn under Värde.
- Välj Prioritet och VLAN inaktiverat.
- Klicka OK för att spara ändringarna.
- Nästa, du måste upprepa stegen för din Wi-Fi-adapter. Så, öppna Egenskaper för ditt Wi-Fi-kort och ställ in dess Prioritet och VLAN värde till Prioritering & VLAN inaktiverat.
- Klicka OK för att spara ändringarna.
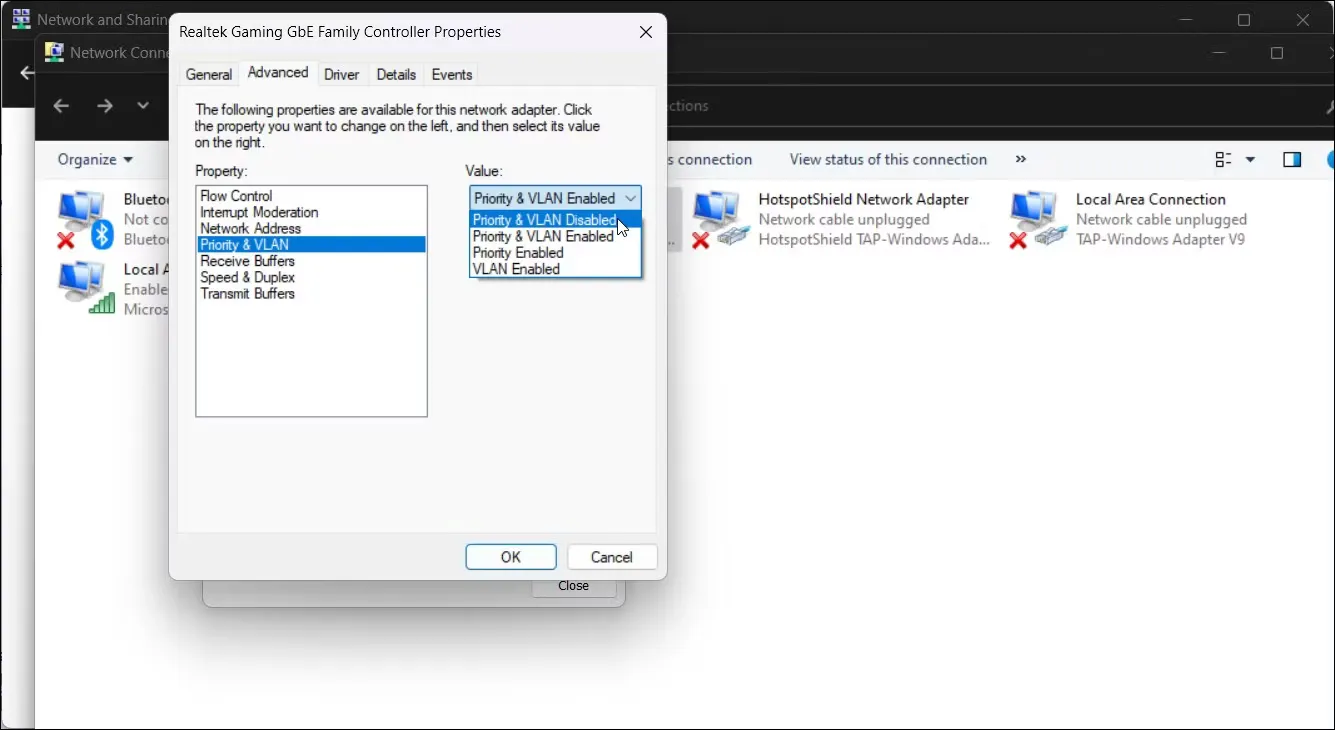
Med prioritetsalternativet för nätverkskort inaktiverat, Windows kommer nu att använda Wi-Fi- och Ethernet-anslutningar samtidigt.